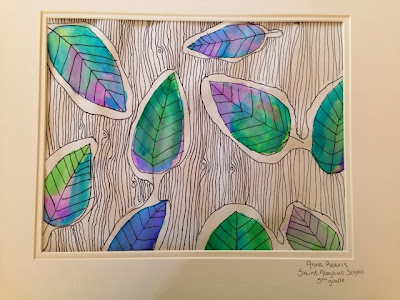
This is a new lesson this year I taught in 4th and 5th grade. I was inspired by a piece I saw on Pinterest, that I think was actually geared towards middle and high school artists. With this lesson students combined the elements of art: visual texture, positive and negative space, line, shape, and color, as well as drawing and watercolor techniques.
This student chose the technique of "wood" and did analogous colors: green, blue, violet.
This student chose the technique of "circles or bubbles" and did the same color scheme.
This student did the texture "scales" and did not really follow a color scheme. But I still liked it so much I had to frame it. I guess the lesson learned here is... don't always do what the teacher says. No, no, no! That can't be right..... ;)
Materials:
- 12x18 white paper
- pencils
- black fine point sharpie
- watercolor paints
- paint brushes
- water
- handouts with examples of visual texture
- paint smocks
Instructions:
- First we review the elements of design, particularly space, line, texture, shape, and color. I teach students how to draw a simple (organic shape) leaf, which we do several times in pencil. Leaves should NOT overlap.
- Trace around leaves leaving a small amount of space so that it appears the leaves are in a bubble. I told students that they could make the bubble go around surrounding leaves.
- Go over pencil lines in sharpie and erase all pencil lines.
- Give students examples of how to draw different textures. Students should fill all the negative space with one texture. This took the most time, probably 2-3 class periods. Some students made the mistake of filling the bubble around the leaves with the texture, so just watch them closely and remind them that they want a nice white bubble around their leaves to make them stand out.
- Last, students will fill in each leaf with an analogous color scheme. I had students choose 3 colors and write them down in pencil on the back of their paper so not to forget.


No comments:
Post a Comment