Pages

Friday, May 30, 2014

Georgia O'Keefe Skulls with a Navajo blanket background

Here are some pictures of one of the last projects completed at Saint Aloysius this year. It was my first time teaching this project and the kids and I loved it! We first learned about the "four corner" states and the Native American tribes who originally lived there. We focused on the art of the Navajo, which are beautiful weavings.

  • We discussed the weaving process, shapes, symbols, and colors most common in the art, as well as the uses for the blankets. Students viewed many examples of authentic weavings. 
  • Students then designed their own blankets with pencil and rulers. They then outlined their pencil lines with sharpie. This took us about 2 art periods. 
  • Next, students colored them in with good old Crayola markers. This took us another 2-3 art periods.
  • Finally, we talked about Georgia O'Keefe and her bone drawings. A great book to go along with this unit is Georgia's Bones by Jen Bryant. 
  • Students then looked at pictures of different animal skulls (cow, horse, deer, and other animals that might be found in New Mexico) and did their best to draw their own skull on white paper. We discussed the elements of Line, shape, and especially value during this portion. We used a Kleenex to "blend" the values. 
  • We finished up by cutting out the drawing and gluing it in the center of the blanket. I had the students punch holes and use yarn to add fringes to the bottom of the blanket.
Check out some of the examples below!


Now all the kids want to do is an actual weaving. I promised we would get around to it next year. 

Thursday, May 8, 2014

Mosaic Flowers


This is one of our BIGGEST projects if the year in the primary grades. Students learn about mosaic art and make a giant mosaic flower. I teach them how to draw different types of flowers first. Then, they being outlining with "tiles" cut from scrap pieces of paper. Then we cut out our flower and glue it to the stem and leaves, which we create using a wavy, curved, or zig-zag line. It takes them about 4-5 art periods to finish the entire project, but is well worth the wait. We finished them just in time for Mother's Day this year!
This year we read The Tiny Seed by Eric Carle, to learn the life cycle of the flower. It was the perfect book, because in the story the "tiny seed" grows to be a giant flower. 
Click here to see some mosaics we did last year!

Thursday, April 24, 2014

Jackson Pollock Butterflies


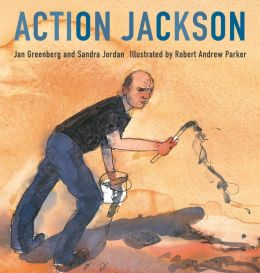
Here I am in front of one of the many displays at the Saint Aloysius Art Show. The Jackson Pollock Butterflies was a new lesson I came up with this year. The book I used to introduce Jackson Pollock to my students was "Action Jackson" by Jan Greenberg and Sandra Jordan. The students enjoyed the story and looking at his many splatter paintings. There is also a really great youtube video that shows many of his paintings in a slideshow here: 
 Action Jackson
Students seems to be amazed that they could easily make their own small-scale splatter painting. 

We didn't stop there. The next week, I had the 1st graders tell me what they had learned about butterflies in their science lesson that week. Some questions I asked were:

What are the parts of a butterfly? 
Where do they come from?
When and where do we see butterflies?

We then used our Jackson Pollock paper to make symmetrical wings for our butterfly. Students cut out their own butterfly body, eyes, and antennas.

They turned out super cute and perfect for spring. Hope you enjoy.... and Happy Spring!!!

Thursday, March 20, 2014

Self Portraits

Just a few of this year's 4th grade self portraits! Click here to see the original post from last year!


Mini Mondrians

This was a new project this year. 1st grade loved it! I think their favorite part was pulling off the painters tape and seeing what it looked like after painting! Great opportunity to teach shapes and the complimentary colors.  


Eric Carle Animals

Some of this years Eric Carle animals. Here is the original post from last year. You have to scroll down to the dragon.... it's the best!


Simple Color Scheme Vases

With these vases we discussed symmetry, color schemes (monochromatic and complementary), organic shapes, and lines. The process is pretty self-explanatory. This was a project we did for art to remember!


Andy Warhol Hand "Prints"

This is a great project for preschool, Pre-K, or adaptive art. it took about 3-4 hours to complete (broken up into 30 minute sessions). In my current school, I have 3 and 4 year olds. With 3 year olds, they needed help tracing and cutting out their hands. the 4 year olds had no problem! Some things we discussed and learned about were:
  • Colors
  • Tracing
  • Gluing
  • Cutting
  • Coloring (outlining and coloring without scribbling- and doing so in the same direction to cover the entire square)
  • What a "print is"
  • Who Andy Warhol was


Preschool
On display

Keith Haring


My Jr. High students learned about Keith Haring and his unique style before making their own Keith Haring. I encouraged them to have figures that were moving, as Keith Haring would have. We used bright colors and little to no color variation. 6th grade colored theirs in with marker, while 7th and 8th painted with watercolor. I would recommend the watercolors.... they turned out much nicer. The last one is my favorite.
This gal loves herself some bball

This guy is a soccer star

This kid just likes to practice his moves on the trampoline

Don't leave your dog outside unattended.... lesson learned.

Volleyball player

Softball player

She loves to dance

Pie. Is. His. Life.

Wednesday, February 5, 2014

Warm and Cool Weaving

In kindergarten and first this year I taught a weaving using warm and cool colors. I explain to students that a weaving goes "under and over." I also tell them to pretend that the strips of paper are hungry. You have to open their big mouths (lift the strip up) and the other strip going in is the food. It kind of helps them with the "under" part. This is their first weaving so spaces are left in between strips to make the weaving process easier. I also don't have them go over/under every single strip. I tell them to pick a color and weave under only that color. Then change colors for the next strip of paper.


Materials:
  • 12x12 black paper
  • warm colored 1" strips of paper
  • cool colored 1" strips of paper
  • glue
Procedure
  1. Day one: Introduce the art of weaving and discuss warm and cool colors. Glue cool colored strips of paper in one direction onto the black paper. Only put one dot of glue on each end of the strips, otherwise your students' weaving will fail miserably. Remind them, "just a dot, not a lot". They love that. Or, you can even sing, "A little bit of glue, a little bit of glue, a little bit of glue will do." You can't really get 5 and 6 year olds to do much without a song or rhyme of some sort :)
  2. Day 2: Cool strips are dry, yay. Weave warm strips into blue strips. Focus on just one color each time. 
That's all! Enjoy. -Miss S


Henri Matisse Inspired Goldfish Still-Life

In 6th grade this year I taught my students about Henri Matisse and his still lifes. This is my first year teaching middle school so I had no idea what to expect..... I love how they turned out. You can DEFINITELY notice at this age who really has that natural artistic ability.  
Materials:
  • 12x18 white paper
  • pencil
  • black fine point sharpie
  • watercolor paints
  • water
  • paint smock
  • examples of Henri Matisse's art
  • a still life for students to look at (I put a fish bowl, a flower, some fruit, and a mug onto a table)
Instructions:
  1. I had students practice blind contour line drawing before this. They actually liked it!
  2. Teach students about Henri Matisse. I made a powerpoint on the guy and pointed out his use of colors, and patterns/designs in backgrounds. Some students even added a window in the background like he has done in several paintings. 
  3. Students referred to an empty bowl of water on a table with several objects. Students were allowed to add imaginary objects or remove objects in their drawing. Students had to imagine their own fish because all my goldfish had died.... whoops.
  4. When it came to painting I had them use a lot of water and wet-in-wet inside the fish bowl to make it look like it really had water in it. 
Sixth grade success! 

Proportions of the Face

In 4th and 5th grade we learn the proportions of the face and make a self portrait with pencil. When working on our self portrait, we discuss shape, proportion, balance, symmetry, texture, and value.


I have a handout I give to the kids to help them draw their face. I honestly DO help a lot on this one, especially with the blending of the tones on the face. 

Watercolor Leaves with Textures

This is a new lesson this year I taught in 4th and 5th grade. I was inspired by a piece I saw on Pinterest, that I think was actually geared towards middle and high school artists. With this lesson students combined the elements of art: visual texture, positive and negative space, line, shape, and color, as well as drawing and watercolor techniques. 
This student chose the technique of "wood" and did analogous colors: green, blue, violet. 
This student chose the technique of "circles or bubbles" and did the same color scheme. 
This student did the texture "scales" and did not really follow a color scheme. But I still liked it so much I had to frame it. I guess the lesson learned here is... don't always do what the teacher says. No, no, no! That can't be right..... ;)

Materials:
  • 12x18 white paper
  • pencils
  • black fine point sharpie
  • watercolor paints
  • paint brushes
  • water
  • handouts with examples of visual texture
  • paint smocks
Instructions:
  1. First we review the elements of design, particularly space, line, texture, shape, and color. I teach students how to draw a simple (organic shape) leaf, which we do several times in pencil. Leaves should NOT overlap. 
  2. Trace around leaves leaving a small amount of space so that it appears the leaves are in a bubble. I told students that they could make the bubble go around surrounding leaves. 
  3. Go over pencil lines in sharpie and erase all pencil lines. 
  4. Give students examples of how to draw different textures. Students should fill all the negative space with one texture. This took the most time, probably 2-3 class periods. Some students made the mistake of filling the bubble around the leaves with the texture, so just watch them closely and remind them that they want a nice white bubble around their leaves to make them stand out.
  5. Last, students will fill in each leaf with an analogous color scheme. I had students choose 3 colors and write them down in pencil on the back of their paper so not to forget.  
One of my students did not follow directions, but I actually LOVE the way it turned out. I think he did whatever color he wanted. I can easily see this resulting bad for some students because their colors might mix and create a grey or brown color. Next time I do this I may allow students to choose their colors and just enjoy experimenting with the wet-in-wet technique. They really thought it was neat!